How to Create a Campaign on Lutendo
Creating a campaign on Lutendo is a straightforward process that helps you promote your products and gather authentic reviews. This guide will walk you through each step of campaign creation.
Accessing Campaign Creation
There are two ways to start creating a campaign:
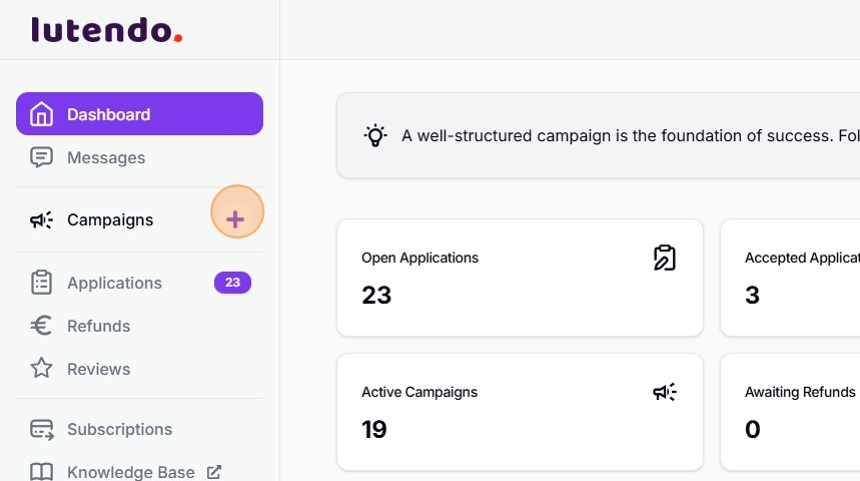
- Via Side Menu
- Look for the ‘Campaigns’ item in the side menu
- Click the ‘+’ icon next to it
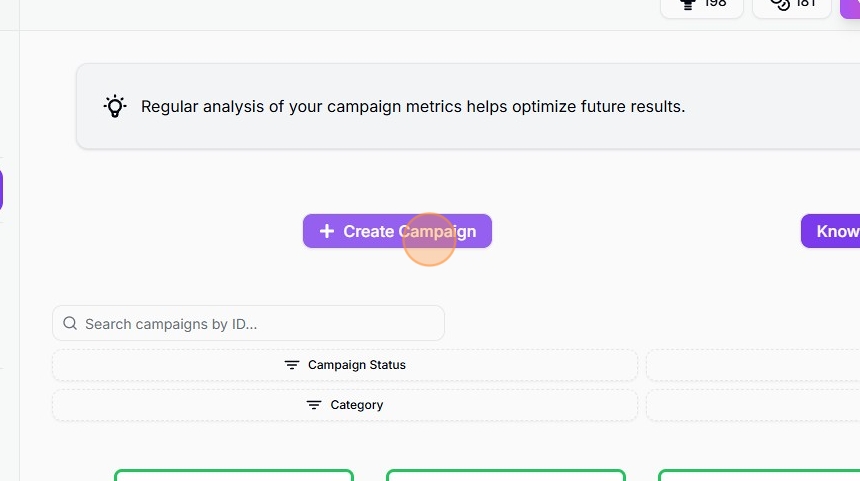
- Via Campaigns Page
- Click ‘Campaigns’ in the side menu
- Click the ‘Create Campaign’ button at the top of the page
Campaign Creation Process
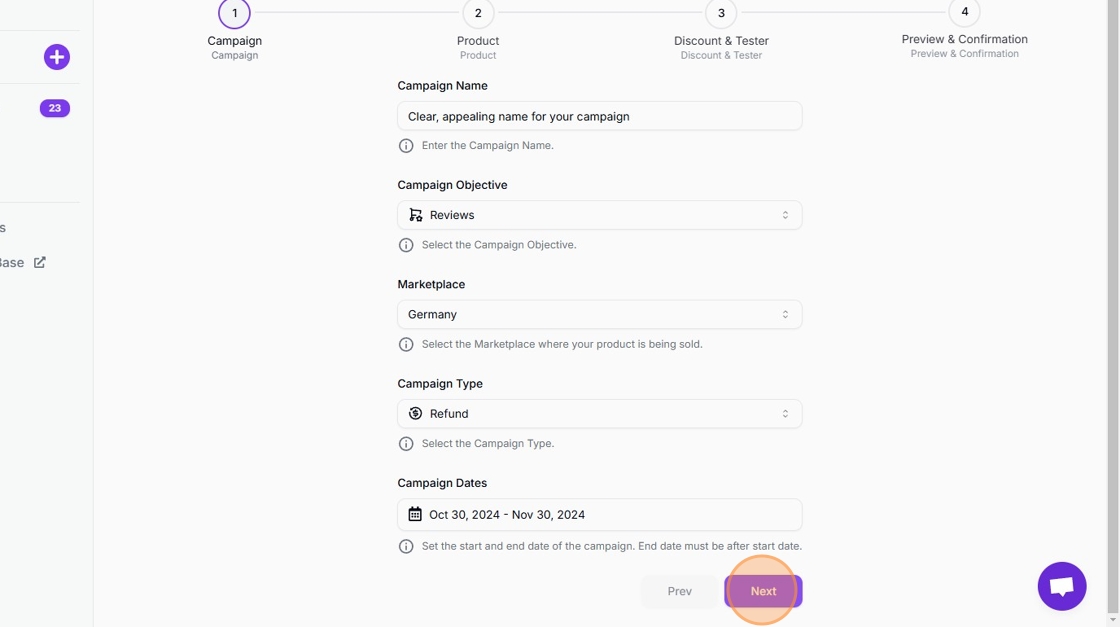
Step 1: Campaign Details
In this initial step, you’ll set up the basic parameters of your campaign:
- Campaign Name: Choose a clear, appealing name that reflects your campaign’s purpose
- Campaign Objective: Select whether your campaign focuses on increasing sales or gathering reviews
For a more detailed explanation of this topic, head over to our article Campaign Objectives - Marketplace: Choose your target marketplace
- Campaign Type: Select from:
- Campaign Dates: Set the start and end dates for your campaign
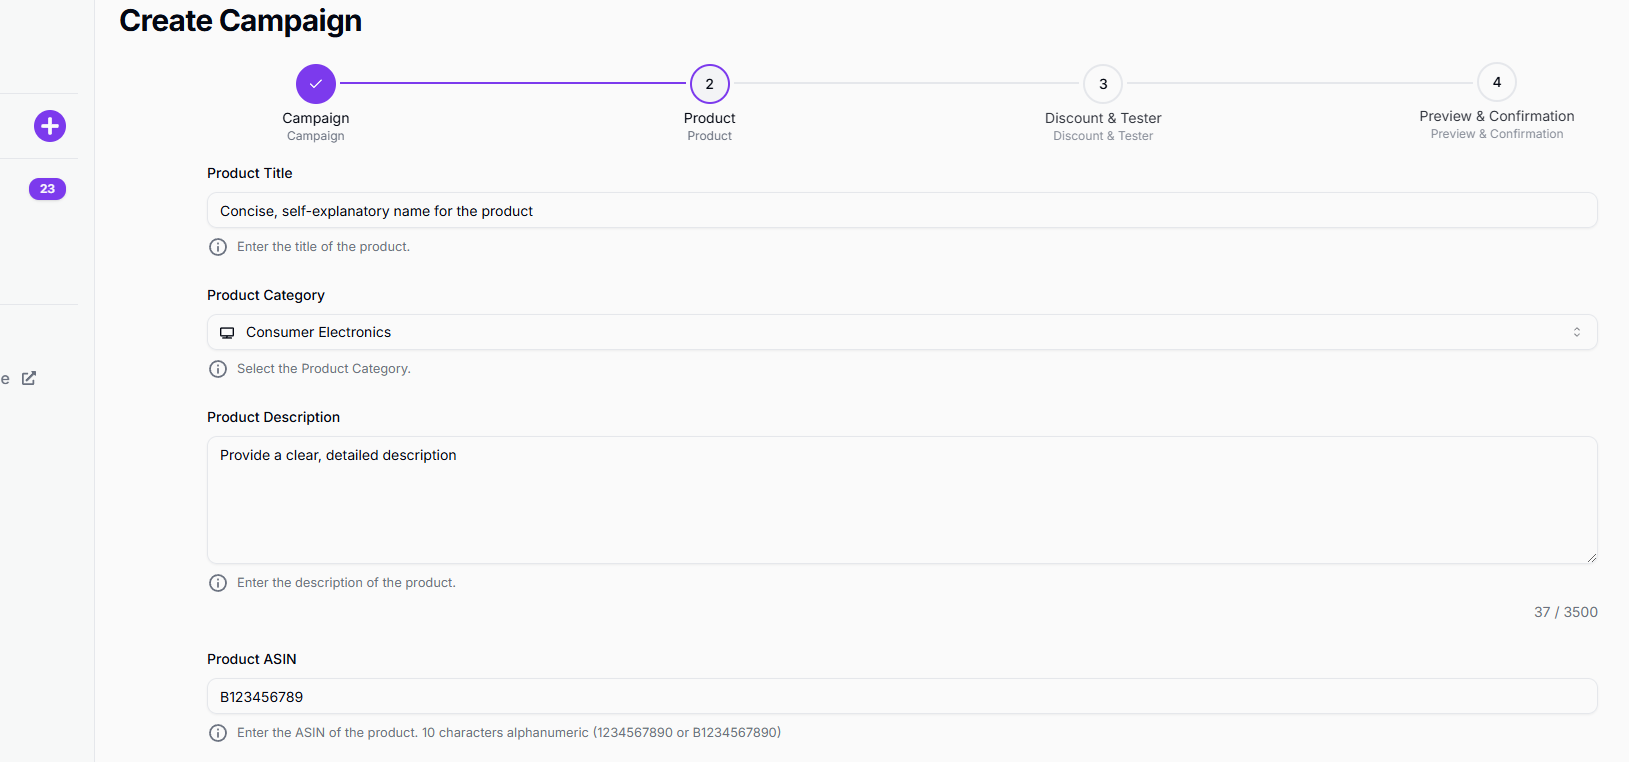
Step 2: Product Information
Provide detailed information about your product:
- Product Title: Keep it concise and consider omitting your brand name to maintain maximum anonymity, similar to the campaign name
- Product Category: Select the appropriate category for your product
- Product Description: Provide a clear, detailed description
- Product ASIN: Enter your product’s Amazon Standard Identification Number
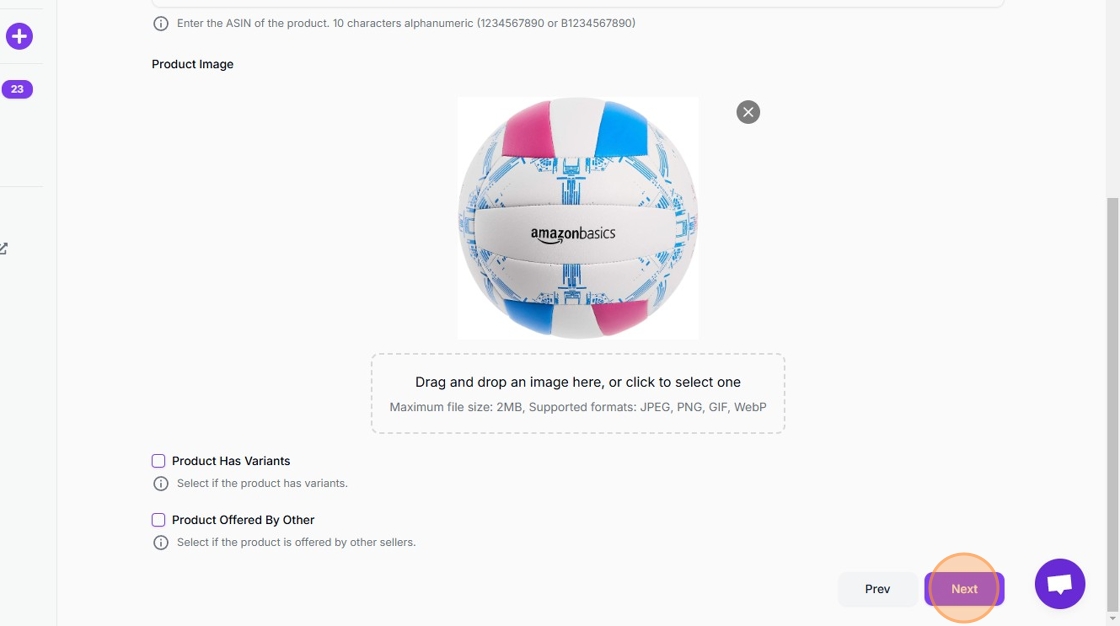
Interested in learning more about finding your product’s ASIN? Our article has all the information you need. - Product Image: Upload a high-quality image of your product. To maintain your anonymity, we recommend using a different image from the one you originally used on the marketplace.
- Product Variants (Optional):
- Check the box if your product has variants and Enter the child ASINs for each variant
- Product Offered By Others (Optional):
- Check this box if other sellers offer the same product and Enter your marketplace seller name for clear identification
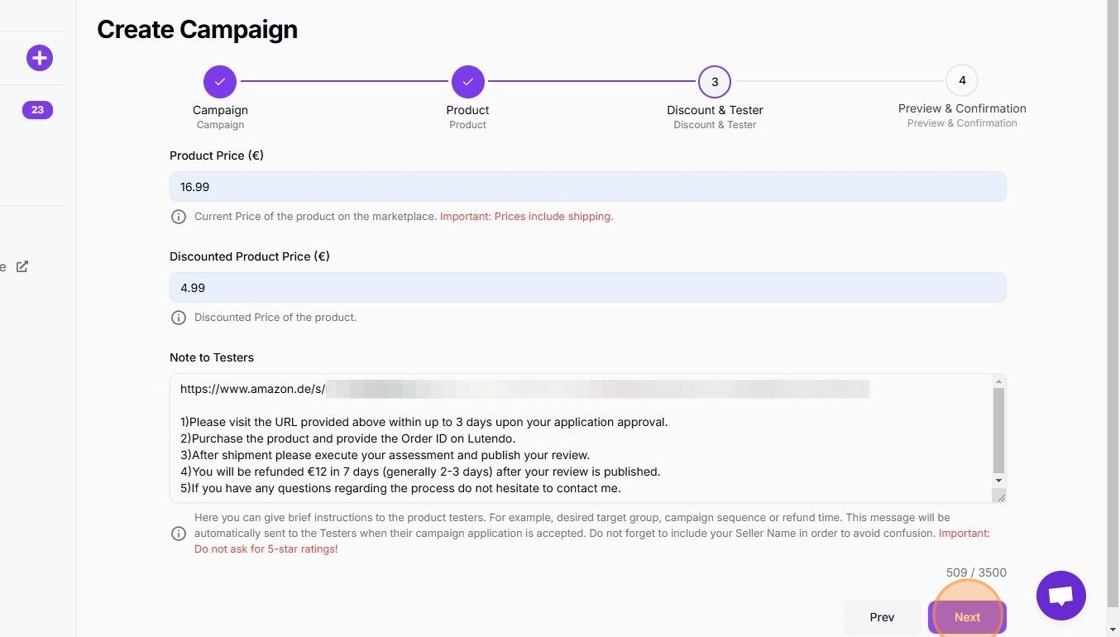
Step 3: Discount & Tester Details
Configure the financial aspects and tester instructions:
- Product Price: Enter the full price including shipping fees
- Discounted Price: Set the price testers will pay
Want to explore the possibilities of setting effective discount rates? Learn more about discount rates - Coupon Codes (Optional – For Discount Voucher campaigns only):
- Generate codes in your Seller Central account
- Enter the codes into Lutendo
- Note to Product Testers: These instructions will be shared with them via chat once they’ve been approved, so be sure to include all necessary information to ensure a smooth experience. Write clear instructions about:
- Participation requirements
- Guiding product testers to your product
- Refund process (if any)
- Any specific guidelines
- View best practices for tester instructions
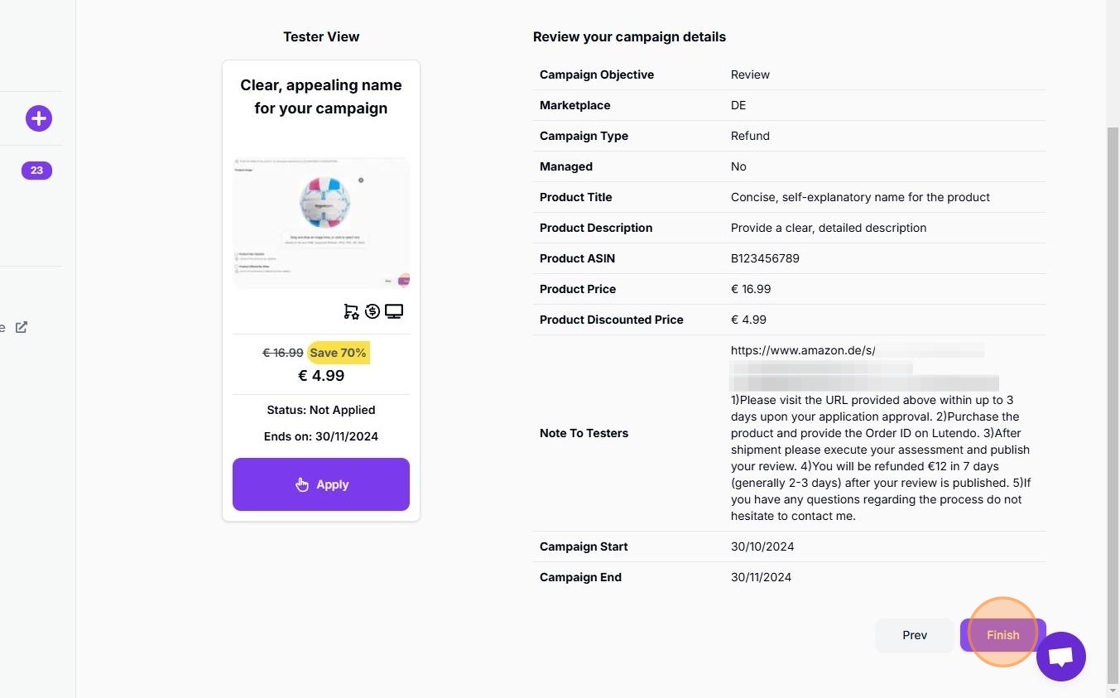
Step 4: Preview & Confirmation
Review and finalize your campaign:
- Review Campaign Details:
- Check all information for accuracy
- Navigate back to previous steps if changes are needed
- Preview Tester View:
- See how your campaign appears to testers
- Ensure all details are correctly displayed
- Create Campaign:
- Click ‘Finish’ to proceed
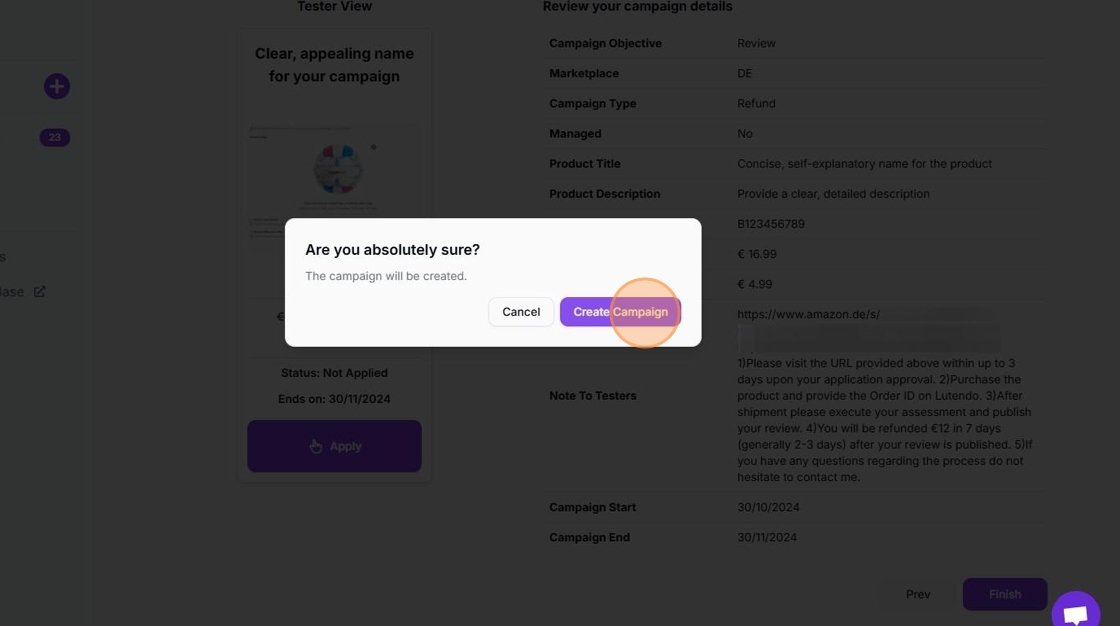
- Confirm your choice in the popup dialog
- Click ‘Create Campaign’ to finalize
Step 5: Activate Your Campaign
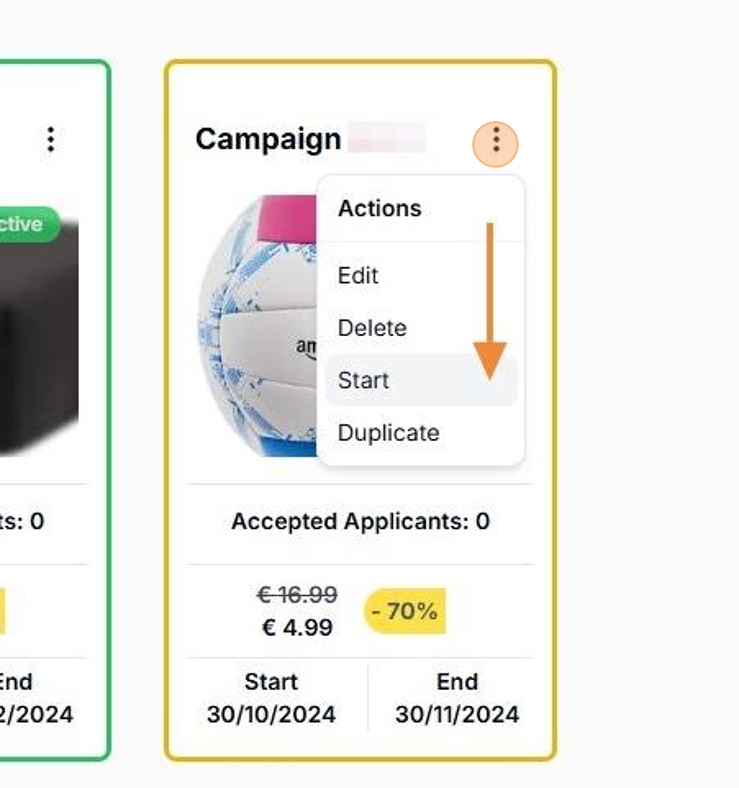
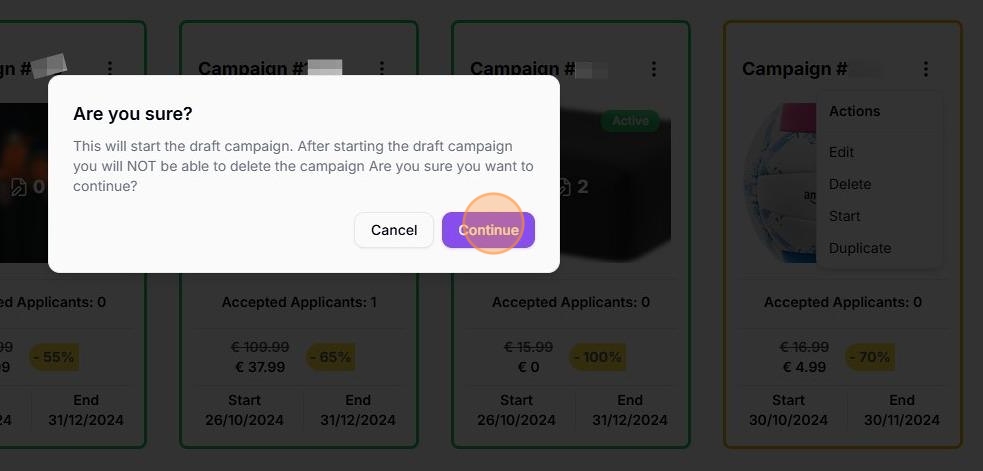
Your campaign will be created in ‘Draft’ mode and You’ll be redirected to the campaigns page.
To activate your campaign:
-
- Find your campaign in the list
- Click the three dots (⋮) in the upper right corner
- Select ‘Start’ from the dropdown menu
If you encounter any issues during campaign creation, please contact our support team through the Help Center or reach out to your account manager.

